Proprietary Lib Cleaner (PLC)
Linux shell script that allows you to silence certain lines from chatty proprietary binaries/libs which makes logcat actually readable, instead of it getting spammed by binaries such as mpdecision or thermal-engine.
Made with intention to be easily extensible for end-user. (would love to see a big database of hexxable strings)
Why I have created it. I have made this shell script because I have experimented earlier with replacing hex strings in proprietary files, which worked out very well. I have had a lot of hassle trying to make the hex string replace work. But I found this great tool called Swiss File Knife that allows you to make hex replacements by just entering the string. Because of this it was very easy to create a template system so that users can easily add more entries to the database, rather then needing to adjust code of script every time.
The template system works like this:
Every binary/library is placed in the corresponding directory but in a virtual replication, in these files are the lines that need to be hexxed out of the binaries are present. nothing less nothing more.
Example 1:
~/ProprietaryLibCleaner/dbs/system/bin contains mpdecision which is a regular text file with the following strings inside it:
Example2: ~/ProprietaryLibCleaner/dbs/system/lib/hw contains sensors.msm8960.so which is also a regular text file since its a patch, it only has a simple reference inside (but a very annoying one)
Code:
mCompEngine is NULL
These 2 examples are listed in the shell script, when more is added it is automatically appended in the 'database'
Last but not least is the patching process which is done on a 'fail-safe' method, it first checks whether its actually applicable before making any changes, if not it will skip it, so it won't make your files unusable
Instructions for normal usage: 1. Download latest release
2. Unpack somewhere on PC
3. Run script with ./PLC
4. Install ADB + ADB USB Driver if not installed
5. Install Swiss File Knife on Phone if not installed
6. View targets & patches
7. Set target and patch
8. Profit
Warning
If you read this you may go blind and never become erect again.
And there is a possibilty a sattelite will fall from the sky and crush your house
This most likely can be incorparated into any rom on any phone
Feel free to post this anywhere and include it in any rom(Just Give Proper Credit)
I made this about a year ago .Works quite well
it makes tweaking very easy
designed to make tearing apart full tweak scripts apart and testing lines a nd full scripts e easy.
allows you to make up to 7 totally different init.d profiles . the ability to turn on or off any profile.
So now you can develop 7 profiles to boot from and run any profile in realtime
also gives you 2 sysctl.conf to boot from and two more to run in realtime
you need root and busybox
the contents of the foldet ( etc) go in /etc
the contents of ( bin) go in /system/bin the 6 files containing (run) need to be executeable
now you can put install-recovery.sh in /etc to get everything to run at boot
if you have Gametheorys kernel you can use the sysinit i provided in / system/ bin
if you already have either of these used by something else just add the lines from mine to yours
init.d
put scripts in the main folder like normal
there are folders in side
prof1 to prof 6
you can set scripts in those
the foldercalled Scripts is to store unused stuff
also is the initd control where you can use root browser root explorer or any scriptmanager to run the (on,off or run) scripts
Note, i cleaned out all my scripts but decided to leave the main folder with a setup i use the most Remove them or use at your risk
now you have
sysctl.conf through sysctl.conf4 in your /etc folder
load those with sysctl settings
init the init.d/scripts/sysctl are scripts to turn on or off sysct1 and 2 and run 3-4 in tealtime
More (run at will) profiles
init.run folder
load setups in run1 to run6 folders
at anytime use the control panel in init.run to exec any ofrun1 through run6
Note all profile folders have a subfolder labeled (a) those are just like pocket folders to store unused scripts
FLASHABLE DISABLER
This design has something very valuable
each profile has its own (applet) in /system/bin
the install-recovery.sh execs all init.d and prof1 through prof6 applets
but when you use the control panel to turn on or off the profiles you are sinply changing the permissions to each (applet)
So incase you put a bad script in and boots up in a loop or something else
i made a flashable zip of all the bootable (applets) with permissions all at zero
This will render all the bootable profiles un executeable
your new init.d script throws you in a loop flash the
InitdDisableall.zip below and reboot
None of the profiles will execute
So this basically gives you 7 init,d folders . you can choose which ones to boot from
for instance
i load one folder with my settings.one core turned off and cpu set at 810 and a clogged up conservative governor with agressive lmk
say i want to convert movies or play games i boot from an init,d folder i loaded with both cores at full cpu and multitasking lmk and a different governor set for speed
And i added a realtime run feature
this means i can exec any of these folders in realtime without rebooting
Then as an added bonus there is an additional folder that allows you to load your profiles to 6 more folders that you can easily exec in realtime without booting
the sysctl has the same idea
you get 2 sysctl.conf you can load with different settings and choose which one to boot from
plus 2 more sysctl.conf to load that you can run in realtime
The idea is to be able to have many Profiles of settings prefabbed and the ability to exec them quickly
This makes switching from performance and battery saving very easy
It makes testing and designing your profiles very easy as well
Now if you look at Sepero's Bootbuddy
it runs scripts at boot from the ext sd
this is awsome for me, when testing scripts i test some from bootbuddy
i use this for certain things like build.prop or certain kernel tweaks that i am not confident about
if this tweak causes a bootloop i can remove the sd card and bootup without the tweak
after several bootups with no issue, i move the tweak from bootbuddy over to init.d
But if you only want to use bootbuddy and not init.d i added 2 more bootable folders so you can choose from 3 profiles to boot from or turn all off
HOW To Develop your profiles
When i start on a new phone this is my formula
first i find supported govenors
i choose the slowest governor
then make an init.d script to load the governor of choice at boot
Then i clog up the governor,this means i slow it down
I change the settings so it doesnt scale up very fast and scales down instantly
Maybe lengthen the duration between mpdecisions
This is awesome for battery use and further testing
Next I want to start chopping away at the cpu, So I remove all cpu cores but 1
then limit the cpu to a lower scale
I usually start nat around 900 mhz
Example
The lg motion with Gametheory's oc kernel with added governors
i used the Conservative governor setwith
sampling down 1
up threshold 96
down threshold 95 ( or higher)
one core on only running at 918 mhz
So now your phone is much slower,Much better battery life but less responsive
do an antutu benchmark
make sure to look at the Details,each individual score
NOTE if you dont know how to get started
use an app like Kernel tuner
check the settings and selected run at boot with init.d
close kernel tuner it will create an init.d script for you
now go to your init.d folder and make a copy of the script
go back to Kernel Tuner and Disable the run at boot settings. it will remove its scripts
but you have your copy
Now for the ease of profiling you need to Batch your tweaks
small and identical for easy swapping and removal
like all vm tweaks in a script only ,net tweaks in a script only
and save the varied settings in a folder
when you are done you will have several folders of batched tweaks
forinstance various Governor tweaks like i posted below
The Ondemand Governor
A init.d script to load the Ondemand governor with stock settings
but it has 4 scripts for ondemand governor with Slower settings and 4 with above stock settings
Do this for every governor you use
The same with cpu max limits
From here on the idea is to chop away at the cpu but keep the score the same or better (when i am done i will run the phone at 594 or 702 but is close to responsive as the 918,and when i run the phone at stock or better phone is fassst)
Running the phone at core only and at lower speeds make its much easier to indentify the results of individual tweaks
Next you need to look at your system
/proc/sys is a good place to start
here are many settings we are gonna start changes to optimize our phone.
fs,kernel,net and vm settings are here
Its nice to know this as many phones have the same files found here but a few may vary
Please Check Attact File For Download Tweak Pak Is Not Flashable.
I Am Not Responsible For Any Damage To Your Device. Try It At Your Own Risk.
Sorry For My Bad English
Hope You Understand What I Want To Say
Credit To rhino889a
Hello, AOSP kk+ users
I searched a lot for this pakage, but i didn't found any one
so, i broght to you a simple, but advanced pakage
it will remove that gapps bloat
then it will install it agin, but only with Google play and it's core apps to work properly.
So, no more bloat,
Just flash it via recovery
Enjoy it!
Download it>>>>>HERE
So It is a post for beginners who want to just look inside the recovery.img and do some modification like changing the default background image to a custom image. So without wasting any time here We Go....
Requirements :
Quote:
Recovery.img (Most Important) :p
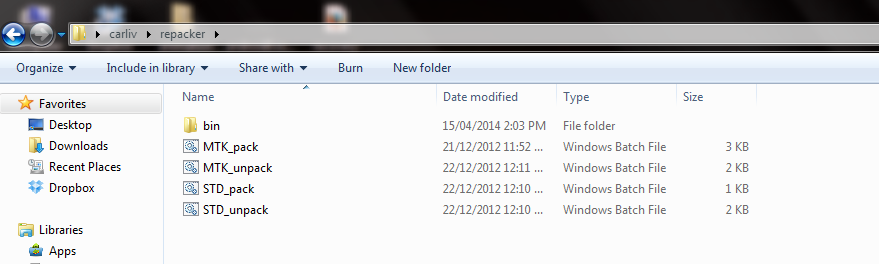
Boot/Recovery repack utils for WINDOWS by @michfood
Any Image editor Like Photoshop Or GIMP .
Procedure :
Quote:
Just place the recovery.img in the same folder where You extracted The boot/recovery repack tool.
Drag and drop recovery.img on MTK_Unpack and it will split the recovery into its parts.
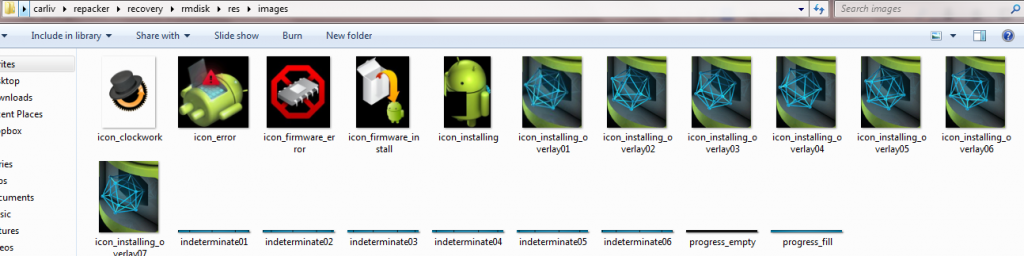
Now browser into recovery > rmdisk > res > images open the images edit them or replace them with your desirable .png's.
Now again drag the recovery folder and drop on MTK_pack after Modification.
Voila .!!!!!!!!
You are Done with changing the background of your custom recovery. */ Just Flash This Recovery In FastBoot. :D
PLEASE PRESS THANKS INSTEAD OF TYPING :fingers-crossed: THANK YOU FOR UNDERSTANDING :o
A cross compiler is a compiler capable of creating executable code for a platform other than the one on which the compiler is running. Cross compiler tools are used to generate executables for embedded system or multiple platforms. It is used to compile for a platform upon which it is not feasible to do the compiling, like microcontrollers that don't support an operating system. From wikipedia
How is that connected with an Android?
In order to create a native C/C++ binary for an Android, you must firstly compile the source code. Usually you can't do so on an Android itself due to lack of proper tools and environment, or hardware barriers, especially amount of RAM. This is why you should learn how to cross-compile, to create a binary on your PC, that your ARM-based Android will understand.
Why do I need it?
You need to learn cross-compiling technique if you want to run native C/C++ programs on an Android. Actually, if you've already built your own custom ROM from AOSP sources (i.e. CyanogenMod), then you used cross-compiling tools and methods even without noticing :).
Building an AOSP ROM is fairly easy, there's one command like brunch, which does the job. However, what if you want to compile a custom, not natively included binary? This is the purpose of this tutorial.
What I will learn from this guide?
How to properly set C/C++ building environment
How to build a native C/C++ application for Android device
How to optimize native binaries for my device
Step 1 - The Beginning
You should start from installing any Linux-based OS, I highly suggest trying a Debian-based distro (such as Ubuntu), or even Debian itself, as this tutorial is based on it :).
In general, I highly suggest to compile an AOSP ROM (such as CyanogenMod) for your device firstly. This will help you to get familiar with cross-compiling on Android. I also suggest to compile one or two programs from source for your Linux, but if you're brave enough to learn cross-compiling without doing any of these, you can skip those suggestions :).
Step 2 - Setting up
Firstly you should make sure that you have all required compile tools already.
Quote:
apt-get update && apt-get install checkinstall
This should do the trick and install all required components.
I suggest creating a new folder and navigating to it, just to avoid a mess, but you can organize everything as you wish.
Now you should make a standalone toolchain, navigate to root of your ndk (this is important) and then build your toolchain:
Quote:
root@ArchiDroid:~# cd ndk/
root@ArchiDroid:~/ndk# build/tools/make-standalone-toolchain.sh --toolchain=arm-linux-androideabi-4.8 --platform=android-18 --install-dir=/root/ndkTC
Copying prebuilt binaries...
Copying sysroot headers and libraries...
Copying libstdc++ headers and libraries...
Copying files to: /root/ndkTC
Cleaning up...
Done.
You should edit bolded variables to your preferences. Toolchain is the version of GCC you want to use, 4.8 is currently the newest one, in the future it may be 4.9 and so on. Platform is a target API for your programs, this is important only for android-specific commands, such as logging to logcat. When compiling a native Linux program, this won't matter (but it's a good idea to set it properly, just in case). Install dir specifies destination of your toolchain, make sure that it's other than ndk (as you can see I have ndk in /root/ndk and toolchain in /root/ndkTC).
Now you need to download my exclusive cc.sh script from here and make it executable.
This script is a very handy tool written by me to make your life easier while cross-compiling. Before running it make sure to edit "BASIC" options, especially NDK paths. Apart from that it's a good idea to take a look at DEVICEFLAGS and setting them properly for your device, or clearing for generic build. You don't need to touch other ones unless you want/need them.
Just for a reference, I'll include currently editable options:
Quote:
#############
### BASIC ###
#############
# Root of NDK, the one which contains $NDK/ndk-build binary
NDK="/root/ndk"
# Root of NDK toolchain, the one used in --install-dir from $NDK/build/tools/make-standalone-toolchain.sh. Make sure it contains $NDKTC/bin directory with $CROSS_COMPILE binaries
NDKTC="/root/ndkTC"
# Optional, may help NDK in some cases, should be equal to GCC version of the toolchain specified above
export NDK_TOOLCHAIN_VERSION=4.8
# This flag turns on ADVANCED section below, you should use "0" if you want easy compiling for generic targets, or "1" if you want to get best optimized results for specific targets
# In general it's strongly suggested to leave it turned on, but if you're using makefiles, which already specify optimization level and everything else, then of course you may want to turn it off
ADVANCED="1"
# Device CFLAGS, these should be taken from TARGET_GLOBAL_CFLAGS property of BoardCommonConfig.mk of your device, eventually leave them empty for generic non-device-optimized build
# Please notice that -march flag comes from TARGET_ARCH_VARIANT
DEVICECFLAGS="-march=armv7-a -mtune=cortex-a9 -mfpu=neon -mfloat-abi=softfp"
# This specifies optimization level used during compilation. Usually it's a good idea to keep it on "-O2" for best results, but you may want to experiment with "-Os", "-O3" or "-Ofast"
OLEVEL="-O2"
# This specifies extra optimization flags, which are not selected by any of optimization levels chosen above
# Please notice that they're pretty EXPERIMENTAL, and if you get any compilation errors, the first step is experimenting with them or disabling them completely, you may also want to try different O level
OPTICFLAGS="-s -flto=8 -ffunction-sections -fdata-sections -fvisibility=hidden -funswitch-loops -frename-registers -frerun-cse-after-loop -fomit-frame-pointer -fgcse-after-reload -fgcse-sm -fgcse-las -fweb -ftracer -fstrict-aliasing"
# This specifies extra linker optimizations. Same as above, in case of problems this is second step for finding out the culprit
LDFLAGS="-Wl,-O1 -Wl,--as-needed -Wl,--relax -Wl,--sort-common -Wl,--gc-sections"
# This specifies additional sections to strip, for extra savings on size
STRIPFLAGS="-s -R .note -R .comment -R .gnu.version -R .gnu.version_r"
# Additional definitions, which may help some binaries to work with android
DEFFLAGS="-DNDEBUG -D__ANDROID__"
##############
### EXPERT ###
##############
# This specifies host (target) for makefiles. In some rare scenarios you may also try "--host=arm-linux-androideabi"
# In general you shouldn't change that, as you're compiling binaries for low-level ARM-EABI and not Android itself
CONFIGANDROID="--host=arm-linux-eabi"
# This specifies the CROSS_COMPILE variable, again, in some rare scenarios you may also try "arm-eabi-"
# But beware, NDK doesn't even offer anything apart from arm-linux-androideabi one, however custom toolchains such as Linaro offer arm-eabi as well
CROSS_COMPILE="arm-linux-androideabi-"
# This specifies if we should also override our native toolchain in the PATH in addition to overriding makefile commands such as CC
# You should NOT enable it, unless your makefile calls "gcc" instead of "$CC" and you want to point "gcc" (and similar) to NDKTC
# However, in such case, you should either fix makefile yourself or not use it at all
# You've been warned, this is not a good idea
TCOVERRIDE="0"
# Workaround for some broken compilers with malloc problems (undefined reference to rpl_malloc and similar errors during compiling), don't uncomment unless you need it
#export ac_cv_func_malloc_0_nonnull=yes
As you can notice, my magic script already contains bunch of optimizations, especially device-based optimizations, which are the most important. Now it's the time to run our script, but in current shell and not a new one.
Quote:
root@ArchiDroid:~# source cc.sh
Done setting your environment
CFLAGS: -O2 -march=armv7-a -mtune=cortex-a9 -mfpu=neon -mfloat-abi=softfp -s -flto=8 -ffunction-sections -fdata-sections -fvisibility=hidden -funswitch-loops -frename-registers -frerun-cse-after-loop -fomit-frame-pointer -fgcse-after-reload -fgcse-sm -fgcse-las -fweb -ftracer -fstrict-aliasing -DNDEBUG -D__ANDROID__
LDFLAGS: -Wl,-O1 -Wl,--as-needed -Wl,--relax -Wl,--sort-common -Wl,--gc-sections
CC points to arm-linux-androideabi-gcc and this points to /root/ndkTC/bin/arm-linux-androideabi-gcc
Use "$CC" command for calling gcc and "$CCC" command for calling our optimized CC
Use "$CXX" command for calling g++ and "$CCXX" for calling our optimized CXX
Use "$STRIP" command for calling strip and "$SSTRIP" command for calling our optimized STRIP
When using makefiles with configure options, always use "./configure $CONFIGANDROID" instead of using "./configure" itself
Please notice that makefiles may, or may not, borrow our CFLAGS and LFLAGS, so I suggest to double-check them and eventually append them to makefile itself
Pro tip: Makefiles with configure options always borrow CC, CFLAGS and LDFLAGS, so if you're using ./configure, probably you don't need to do anything else
Command "source cc.sh" executes cc.sh and "shares" the environment, which means that any exports will be exported to our current shell, and this is what we want. It acts the same as AOSP's ". build/envsetup.sh", so you can also use . instead of source.
As you can see above, my script should let you know if it properly set everything, especially if $CC points to our ndkTC. It also set a generic "$CCC" and "$CCXX" commands, which are optimized versions of standard $CC. $CC points to our cross-compiler, $CCC points to our cross-compiler and also includes our optimization flags.
Remember that $CCC and $SSTRIP command will only work if you source'd cc.sh script explained above. $CCC command compiles source code to a binary with already optimized flags (device flags, optimization level, optimization flags, linker flags), while $SSTRIP command strips "bloat" from output binary, such as comments and notices. The purpose is to make a binary smaller and faster.
You can check if your binary has been compiled properly through readelf command.
As you can see, I've compiled a binary optimized for ARM v7, with THUMB-2 instructions and NEON support. How nice! Is it because of device-specific flags? Let's check what happens if we use $CC instead of $CCC:
As you can see, if you do not specify flags, you'll lose major portion of optimizations. Of course binary will work properly, hence it has been cross-compiled for ARM, but we can always make it smaller and faster! :)
Step 4 - Testing
A favourite part of everything, tests! :)
In above example I pushed my binary straight to /system/bin directory, which is in the Android's PATH. If you don't have rooted device that's not a problem, you can use /data/local directory or /storage/sdcard0. You can also upload your binary anywhere you want and download it as any other file, then run from /storage/sdcard0/Download, this way doesn't require even working ADB :). Just don't forget about setting proper permissions afterwards!
Now let's try to run it! :)
If your binary is not in the PATH, you should write full path to your binary of course. As I pushed my binary to /system/bin, I don't need to do so.
If everything finished successfully and you got your very first Hello World response as above, congratulations. You've just compiled and ran your first native C/C++ program on Android device.
What to do next?
In theory, you can now compile anything you want. Here are some apps that I'm using in my ArchiDroid ROM:
Let me start this off by saying I'm sorry for posting this thread in this side forum which is designed for developers, I only done this so the thread can be recognized and hopefully I can get some expert advice.
I am a 2nd year Forensic Computing student (UK resident/university) and I've been looking into a final year project which involves some form of forensic analysis of a computing system. Ever since I bought my HTC One and I rooted it, I've become quite interest in android as a whole. As of late, my HTC became carrier blocked (I bought it on contract from an eBay seller and they blocked it and won't respond back) so in essence I have a glorified media player but still a powerful device.
I want to make my final year project (Which accounts for roughly 40% of degree) a forensic analysis of a rooted android phone.
I'm posting here (In the midst of developers) because I wish to attain advice and knowledge and some form of help (I'm not asking for anyone to do it for me, neither am I attempting to cheat) so I can produce a great project and a impressive dissertation.
Thank You (I'm sorry moderators but in normal forums, I don't know if this would have become recognized)
1.Now decompile your android.policy.jar ( I GIVEN TOOL INSIDE)
NOW copy all smalli to your decompiled android.policy .jar folder one by one
Now open all files related to com\android\internal\policy\impl mine files
Search " 0x10" Copy the whole id .
Open my provided public.xml
Search for that id in my public.xml
Copy the text of that id.
Like if my Public id is "0x101000e"
but in you pubilc.xml it start from "0x0101000e" means you have to add 0 before 1
its a boring part naa but its too much neccesarry too soo better you Do it carefully slow slow dont do fast other it will create reason for bootloop:cool:
NOW OUR 2ND PART IS COMPLETE nOW TIME TO START 3 PART
I have a LG Optimus L5 II at this point in time there is now way to unlock my bootloader.
after some research I noticed that other devices can get CWM on there phones with locked bootloader. but I did not find any tutorials explaining how to do this. so I decided to write this tutorial to help everybody in the same situation.
Disclaimer
Code:
* Your warranty is now void.

* I am not responsible for bricked devices, dead SD cards,

* thermonuclear war, or you getting fired because the alarm app failed. Please

* do some research if you have any concerns about changes made using this guide

* before using it! YOU are choosing to make these modifications, and if

* you point the finger at me for messing up your device, I will laugh at you.
basically when your phone boots it starts it begins to load the system.
when the system loads it starts t read a series of files. we intercept the files and tell it to stop loading and launch cwm from a tar file.
because you phone is loading it has already passed the check to see if the system is secure(IE checks that its not loading a custom software).
this process is called 2nd init.
Step 2
getting your phone to load a script at startup.
so now we have to get a script to load on startup. there are numerous ways of doing this. the most universal way is to use init.d.
because your bootloader is locked you most likely dont have init.d support.
to give support we need to change the install recovery file located
Code:
/system/etc/install-recovery.sh
this file is present on most devices. when your phone loads this file we will tell it to execute all files in /system/etc/ini.d
attached is a init.d installed that you can download so you dont have to manualy change anything yourself.
Step 3
Making sure script are loading on startup.
in the previous step I included a init.d script called datetest.
after completing step 2 restart your phone.
using root explorer go to
Code:
/data/local/tmp/
there should be a file called
Code:
init.d_log_test.txt
if you open that file you should have the date and time that the script was run.
Step 4
Installing the custom script.
Now that we have init.d support all we need to do is install the script
once again I have included a recovery installer.
this will put the unsecureboot in the init.d folder as well as create a folder in your system directory called bootstrap with all required files
Step 5
Getting the key
when the script is executed it will run the key check to identify what key is being pressed. in my case the vol + key is 115
if the correct key is being pressed it will launch the recovery.
to identify the correct key
use root explorer and navigate to
Code:
/system/bootstrap
open the file get key and select open as script
press execute and press the key you want to use to launch the recovery.
you need to do this at the same time
it will then return the key being pressed
if it returns -1 then it is not identifying the key try a different key.
Step 6
Modding the script
open the init.d script 001unsecureboot
find this line
Code:
if $BB [ "$key" = 115 ]; then
replace the key with the key you got from the previous post
Step 7
Modding the Recovery
I have never ported a recovery before so i am not sure what needs to be changed in the recovery.tar
I was lucky enough for the recovery to work out of the box. with a few minor adjustments to the recovery.fstab.
but if you are familiar with cwm I am sure you will be able to understand.
Step 8
Rebooting to Recovery
there are two ways of doing this.
ether reboot and keep pressing the key that you selected
or you can run the app provided.
Step 9
Enjoy
now you should have CWM on your phone with a locked bootloader.
If not please leave me a comment. I will try my best to identify the problem.
FEATURES
This script is based on a couple of scripts Victod with performance improvements and enhancements RAM Dual Swap and FSTRIM ADVANCED FEATURES
-Dual Swap system and cache (383992KB swap (383MB SWAP)
-Improve the performance of your cell
-On FSTRIM in DATA / SYSTEM / CACHE (To learn more is FSTRIM visit this link) (Link)
-Improved loading the ext4 partitions
REQUIREMENTS
-Kernel with swap (recommended kernels chil and CeXtel)
-Kernel/ROM with Init.d (recommended kernels chil and CeXtel)
INSTRUCTIONS
1º copy the script to the sd or internal
2º wipe cache
3º Flash the zip
4º reboot and enjoy the script
CHANGELOGS
V1:Inicial
TESTED DEVICES
-Huawei ascend G510/Y300 WITH 4.1/4.4.2
In the time I’ve spend dealing with open source projects and just being around fellow developers, I’ve found that there are a few things that should not happen but continue on happening.
Why does this happen?
Maybe a case of laziness, maybe they are trying to hide something….who knows but one thing that is sure is that it should not happen.
What I’m speaking of is people uploading repos without commit history. It bugs the living hell out of me. It does because sometimes I’m trying to learn how to do something and without commit history, is kind of difficult to do so. I mean, some brag that they’re 100 percent open source but I don’t think you can claim that without commit history in place.
Also, you can’t complain if you’re not willing to provide a solution to the problem….right?
Ok, well I will go ahead and provide a simple step by step way of uploading a repo with commit history as well as provide screenshots for those that learn by seeing.
So let’s say you want to upload a repo to your github but you don’t want to fork it for one reason or another.
I personally like to upload repos instead of forking them ONLY because I had a case back during Android 4.1.2 where I forked AOKP’s frameworks_base repo and some how it got corrupted and github claim that there was nothing they could do because it was a fork.
This made me mad and ever since I upload repos with commit history instead of just fork them on github.
Anyways, let’s start……
Find that repo and copy the HTTPS clone URL
Open up a terminal then type in "git clone + the https URL"
Press Enter and let it do it's thing
Now head over to github and create a repo, this is important
Now type in the name of the repo (whatever you want) and hit "Create repository"
You will be prompted with a screen like below, the bottom part is what we'll be using
Open up a terminal and navigate to the repo you git cloned above
Ok so when you fork a repo, you usually have a .git folder and with that it has a origin. Where it came from and what is used to know where to push to if you typed in something like git push origin or whatever. With that said, you have now git clone this repo and are wanting to upload it but yet keep commit history. So you need to type in the following command to remove the origin and have it pointing to your newly created repo
Keep in line with the step above, type in "git remote rm origin"
With all repos, you have branches. Branches are generally used to create snapshots of your work but sometimes used to work on other things while keeping the main goal in place and not having to create another repo. For example, if I had a repo that is used for KitKat 4.4.2 but Google decides to push 4.5 or 5.0 or whatever and I want to keep the work I did on 4.4.2, I would simply create another branch and use it for 4.5 or 5.0 or whatever.
With that said, you need to create a branch to start things off since this will a new repo....at least for you it is.
Type in "git branch master" and you'll find sometimes it exists, sometimes it doesn't. If it does then that's good......don't freak out! Just means you don't need to do this step :)
Ok after this you will need to go back to your github repo you created not so long ago and find the two lines I highlighted/had arrows pointing to and copy/paste them into terminal
Make sure you type in your Github username/password when prompted and the end result should look like this
ENJOY and hopefully this will help someone that doesn't exactly want to hide their kanging tracks but just doesn't know how to upload a repo with commit history!
I'd like to offer a $20 "promise" bounty to someone who can come up with two scripts for me.
One script to 'Enable Glove Mode' and another to "Disable Glove Mode'.
I'll use Tasker to do the switching between two modes if possible.
This is for AOSP ROM's and here is the GitHub commit:
I got the idea from broodplank1337's thread here. But while his app is able to turn on Glove Mode in CM11, it doesn't give me any Tasker functionality for automation that I need. http://forum.xda-developers.com/show...php?p=52142538
Bounty is dependent on this working for TMO Galaxy Note 3 in latest build of CyanogenMOD 11.
Here I Present you The PMP most Fastest and Smoothest Performance based Mod For galaxy pocket ..
#CREDITS
Mohitash sir (mohitash@xda)
Samsung For pocket
Google For android
And me :)
If i missed anyone please PM me i will add and sorry if i made any mistakes and please dont spam my thread ..
#MOD Features
*.Performance Improvered
*.Lightweight scripts
*.Scripts maintained for the perfect result
*.framework and service tweaks (GT-S5300)
*.libncurses.so, libsqlite.so andlibsqlite_jni.so tweaks
*.Better Battery backup
*.Better Graphics
*.Kernel Tweaks
*.And Many More...
*.New PMP Script
#REQUIREMENTS
*.Rooted Device
*.Busybox Installed
*.init.d Support
*.CWM Recovery
#INSTRUCTIONS
*.Make Backup First
*.Wipe cache and dalvik cache
*.Install MOD with CWM Recovery
*.Reboot
*.Again go to recovery, wipe cache and dalvik cache then reboot
Hello everyone, i just wanted help with my Bash script!
I usually flash nightlies and when ever i flash them, i lose my tweaks :(
So i decided creating a bash script for myself,
Here's how it is....
Code:
#!/system/bin/sh


## personal file

tweaks=/sdcard/tweaks


build=/system/build.prop


## loop trough $tweak


sed -r '/(#.*|^ *$)/d;/.*=.*/!d;$a' $tweak | while read line

do

        ## get entry from $tweak

        entry=$(echo $line | sed "s/=.*//")


        ## if variable already present in $build

        if cat $build | grep -q $entry

        then

                ## override value in $build if different

                if ! cat $build | grep -q $(cat $tweak | grep $entry)

                then

                        sed -i "s/^${entry}=.*$/${line}/g" $build

                fi

        else

                echo $line >> $build

        fi

done
Everything works but i wanted to keep this process running (For testing purposes),
I mean after my tweaks/values get replaced, i want the same thing to happen with other values!
Eg:- /sdcard/tweak= Contains line= ro.build.model=Nexus 5,
Same file contains ro.build.model=Xperia Z,
now what i want my script to do is, First replace my phone model with Nexus 5 and after some time change it with Xperia Z without starting/stopping any other script!
But i aint too good at this!
So i require a helping hand!
Presenting you first custom recovery recovery other than CWM for MTK 6572 device XOLO A600.
It Would not be possible to port it without carlive Sir.
Head over to his profile and press thanks for his guide to port it for Mtk device.
FEATURES
XMD Optimizer Is A Program Designed To Optimize Your Android Device With Ease. It Provides User Friendly Interface For ALL. It Optimizes Your Android's RAM Which Results To Lagfree UI And More. You Must Follow Carefully All Instructions For XMD To Avoid Device Bricking.
XMD Optimizer is a free software: you can redistribute it and/or modify
it under the terms of the GNU General Public License as published by
the Free Software Foundation, either version 3 of the License, or
any later version.
This program is distributed in the hope that it will be useful,
but WITHOUT ANY WARRANTY; without even the implied warranty of
MERCHANTABILITY or FITNESS FOR A PARTICULAR PURPOSE.
See the GNU General Public License for more details.
You should have received a copy of the GNU General Public License
along with this program. If not, see .
Gmail: renzki29@gmail.com
Credits/Special Thanks To
-- @zeppelinrox -- For V6 SuperCharger And Some Codes/Snippets That Im Using In This Project
-- @andiroxu -- For Project Xtreme
-- @Exit_Only -- For Operation Killjoy
-- Yoda @ Unix And Linux Forums -- For C Code That I've Learn From Him
-- @LENAROX -- For Some Help At The PAST
-- @pikachu01 -- For ThunderBolt!
-- @Buda1996 -- SPL Team
-- @jai554 -- SPL Team
-- All Staffs And Moderators Of XDA -- For XDA Forums
-- All Users/Developers All Over This Forum And Other Forums For Devs
Features
-- App Optimizations Through ZipAlign(Thanks Darky And wesgarner)
-- Performance Optimizations
-- Kernel Tuning Through Sysctl
-- GPU/GRAPHICS Enhancements For Smooth Touchscreen
-- Optimizations Of Database Files Within The System Through SQlite
-- Permission Fix For App To Avoid Disappearance
-- User-Friendly UI
-- Many More Coming Soon
Minimum Requirements
-- A RAM Capacity 256 HP+
-- Android Operating System Version 4.0.3 ICS And Above
-- Custom ROM/Aos, Linux Kernel, CWM/Touch Recovery
-- BusyBox Stable Version
-- sqlite3 And zipalign Binary(Use Installer From Downloads To Install)
-- Init.D Support
-- Root Authentication/Access
-- Flashing Experience
Users Instruction
Quote:
-- Beginners Install --
1. Download The Latest Version From Downloads
2. Move The Version You Have Downloaded To /sdcard
3. Reboot To CWM/Touch Recovery Mode
4. Backup Your Current ROM Using CWM/Touch Recovery Mode
5. Find The Latest Version You Have Downloaded From Downloads On /sdcard
6. Flash The Downloaded Version
7. Reboot
-- Advanced Install --
1. Uninstall All Optimizations Package(Tweaks, Mods, Scripts) Then Proceed To No. 2
2. Download The Latest Version From Downloads
3. Move The Version You Have Downloaded To /sdcard
4. Charge Your Device Upto 100% Then Unplug
5. Reboot To CWM/Touch Recovery Mode
6. Backup Your Current ROM Using CWM/Touch Recovery Mode
7. Find The Latest Version You Have Downloaded From Downloads On /sdcard
8. Flash The Downloaded Version
9. Wipe Battery Stats(If Exist)
10. Wipe Dalvik-Cache
11. Reboot
-- Uninstall --
1. Open Terminal Emulator From App Drawer
2 Type The Following Typos:
Code:
su

xmd -u
3. All Done
-- Usage --
Note: "||" Is Separator
First Of All Type "su" Before Running XMD.
Code:
xmd -x || Execute XMD Optimizer

xmd -r || Reboot/Revert Changes By XMD Optimizer

xmd -u || Uninstall XMD Optimizer

xmd -v || Print Version Details

xmd -h || Print Command Help

xmd -f || Clear DNS Cache
To Enable XMD Optimizer At Boot,
1. Navigate To /etc/XMD
2. Open XMD.config Using Root Explorer
3. Changed "xmd_optimizer=0" to "xmd_optimizer=1"
4. Save It Then Close
5. Delete The "XMD.config.bak"
6. Close Root Explorer And All Done
To Disable XMD Optimizer At Boot,
1. Navigate To /etc/XMD
2. Open XMD.config Using Root Explorer
3. Changed "xmd_optimizer=1" to "xmd_optimizer=0"
4. Save It Then Close
5. Delete The "XMD.config.bak"
6. Close Root Explorer And All Done
To All Devs And Users, You're Allowed/Permitted To Use This At Your Projects But Dont Forget To Insert Proper Credits.
Im Not A Thanks Hunger Like Others But If You Want To Thank Me For This, Consider To Press Thanks Button Or Rate The Thread To 5 Star. Thanks For Using XMD Optimizer. Please Leave A Feedback.
You've probably encountered this problem more than once, and just wanted for that damn warning never to appear again! Here's how!
1. Navigate to /data/log/ using Root Browser, or a similar file manager
2. Find and delete ALL files that end with .log and are over 1MB in size
3. You can also delete the dump files that are more than 1MB to free up extra space
4. Enjoy your larger storage space!
If you want more space, or this just didn't help you, you can go to see what applications take the most of your *data* space by going to the Settings menu. When you have found the applications which data take the most of your storage space, just go to /data/data/ and search for the application. Then, delete the "log" folder or just some files that are useless in your opinion. If this helped you, remember to click the "Thanks" button!
Sent from my GT-S5690v2 using xda app-developers app
after a lot of searching and using Google for days with no really good results i created now my own reg-ex functions to parse some Android shell outputs. So i only want to share my functions coz i dun found something like that.
If u create a Android File-Explorer or something else like this u'll have to get the ls and df output in some situations, if u use C# like me this will be great for u. ;)
im not sure if there is a app that does this
but i want to automatically start a service/app (VPN) when joining a open/free wifi
if not, then how would i best do this?
thank you
Imagine a scenario where you have just system access on android , and you want to continually have it, so you use the su binary, with the correct permission and the setuid flag on, and the owner being system, you do:
Code:
chown 1000:1000 su2

chown 06755 su2
you have the ability to change the owner to system as you do when rooting, and you also set the appropriate permission as you do when rooting,
06775 being the permission code to all have execution permission, and the setuid flag on.
But when dealing with system permission that doesn't work. it only works with root.
I know it's a weird question, but if any could answer it, id be glad .... thanks