I got an idea which will help so many people who are suffering from their phones isn't accepting MicroSD & also others who should use a tool to synchronize their local folders to Cloud daily or weekly.
The idea is to play around with some hardware realted files to simulate SDCard for GDrive. I don't have the experience of how it can be in terms of coding.
But from my side i can give all support for testing if any one can give this a try to be real.
Hi guys can we get a version of clockworkmod for use with a blackphone BP1 from silent circle? I could do with a way to change the privatos to cm12 or cm13 preferably if it were possible to do that or a way to get google services invoked as they are not presnt with privatos.:confused:
Lordroid batch deodex ODTRTA ! or One Deodexer To Rule Them All
Hi all :D
First words :
First of all I want to say that I am not a big software engineer I am just a guy who knows a little about something and wanna make something useful out of it.
Back story:
A friend of mine asked me to make him a GUI batch deodexer to help him in the process of making stock base custom roms so I decided if I am gonna do this I am going to do it right ,I fire up eclipse and stared coding what you are gonna find in this is the result of it.
Note :
Please note that this is the first beta released even though I tested it there may be bugs I didn't run into because lets face it I can't test it for all available devices and ROMs and all PC OSs there is just too much out there so I tried to make the software as OS independent as humanly possible by using only java libraries and binaries (byte code binaries) the only thing that I used native binaries for it is the zipalign binaries because there is no java library for that (if there is I am open to suggestions).
Description:
Lordroid batch deodexer ODTRTA One Deodexer To Rule Them All ,is a free software writen in JAVA that can deodex any android rom with ease ,all you have to do is point the system folder and click the Deodex Now button ! it runs under any OS that have JAVA JRE 8 and higher (see prerequired for more details about this limitation) ,it is compatible with all Roms SDK levels and know architectures but you should note that it support list is the same as smali/backsmali && oat2dex(smaliEX) support list all roms not compatible with them will not be supported by this software since it uses those softwares to do the job.
Prerequired
JAVA JRE 8 and higher if you are deodexing sdk>20 Roms.
JAVA JRE 6 or higher if you are deodexing sdk<20 Roms.
JAVA PATH needs to be set folow those links for more informations Windows | Linux | Mac
How to use : (any system with JAVA JRE 8 installed)
1 - Open the program using JAVA SE
2 - Select a system folder framework folder and build.prop needs to be there app and priv-app are optional
3 - if the chosen folder is valid the Deodex now button will be activated other wise a log with the error will
be printed in the log panel
4 - click on the deodex now and wait for it :D
5 - when done a log file will be saved under logs/yyyy-MM-dd_hh-mm-ss.log check it out to see what happend or just scroll in the log Pannel to see the logs
krassermensch is pleased to present you his simplified version of APK-Tool:
Quick APK-Tool
For most of you it might be not a big problem to simply decompile an APK-File thanks to Connor Tumbleson's APK-Tool which is used as base for this small tool. The advantage of this tool isn't huge but it'll probably save you lots of time.
Features:
the simplest way of decompiling
the simplest way of compiling
the simplest way of signing & zipaligning ==> the simplest way of working with apk files
Setup:
Just download the file from my GDrive and extract the zip to a folder. Furthermore make sure you installed Java on your computer. ==> done, yeah it's really that simple;)
If you don't know exactly how to work with this tool I'd recommend you to read the readme file in the downloaded package.
How this tool found its way to xda:
some months ago (the time I was using Windows) I wanted to materialize my spotify app a little bit. Decompiling, compiling, signing and zipaligning just took too much time so I decided to write a simple batch tool that does all of these operations as quick as possible. The result was the tool I'm presenting you today. Why npw, not earlier? Yeah, quite simple, I forgot this tool, but when I visited GDrive this morning I found this tool. Thinking that some of you might want to have something like that I've just updated to the latest APKTool version to provide you the latest features and compatibilities but that's it. Most probably I won't update this tool no more as I switched to Manjaro OS. If you share this project I'd like you to give credits to me: krassermensch. But now I wish y'all lots of fun using my tool:good:.
since I am on CM13 some of my scripts did not work as expected any more. I discovered this was because my new rom uses toybox instead of busybox. >> read more
Maybe someone else has the same problems. So here my solution.
I wrote a small (flashable) script that combines best of both and makes sure that there are no conflicts between.
Disclaimer:
As usual, you use it on your own risk and I am not responsible for any damage that may happen to your device! :D
Make a Nandroid backup of your system before you flash/execute this script!!!
Prerequisit:
Busybox and toybox are already installed on your device!
(At least busybox + toybox binary have to be located in /system/bin and/or /system/xbin.)
Note: if your rom already comes with busybox instead of toybox, you do not need this script and should not use it!
What does it do? How does it work?
First, it makes sure that toybox is completely installed.
Then it will install all applets from busybox that are not already installed by toybox.
Finally it will make sure to use most compatible commands from bb/tb
Installation:
Copy ZIP to your device and flash it with TWRP recovery or compatible.
- or -
Extract install.sh from ZIP, copy it to your device and execute it as root.
MTK ADB gets you a privileged shell at the push of a button, allowing you to run commands directly on your MediaTek device. Some might wonder if rooting hasn't already solved this. Firstly, root access is persisted by modifying system files. When the real binary gets substituted by that of the root app's, if the device is rebooted, the init daemon running as root runs the binary giving the app root. What's wrong with this? If you have purist tendencies, you probably would want your phone as stock as possible, or at least with your permission. Sadly, not only binaries are dumped. Extra temp files, logs and helper binaries too, that manually removing them is like dancing on floor of pins and a prick means a brick. Not only that, consider yourself blocked from updates. If you're unfortunate enough, an update could result in bricking your phone as the files supposed to be present had been changed. This is more common than you think. MTK ADB makes no changes to your files whatsoever. Also, there's the matter of security/privacy. Root apps tend to always do something in the background. Either sneaking in a new app, or phoning home with your private data, or both. MTK ADB doesn't steal your data. The Internet permission is for Telnet, etc. On some devices, MTK ADB can get root access (depending on manufacturer) while all devices can get shell access. You just have to check which yours belongs. IMPORTANT
Refresh before (and after) clicking Start to check ADB status.
Supports all ADB functionality. Just run "adb <command>" eg "adb pull" (without quotes).
The minimalist terminal is for those who haven't any. Feel free to use your regular terminal (I use Terminal IDE) and keyboard (Hacker's Keyboard is really good). Just run "adb shell" on it.
You can connect to your device using another phone, PC, or anything with a terminal and in the same network by running "adb connect IP_address".
If you get a " device offline" error, disable and enable USB debugging. Next time connect to the network before running the app.
I'm trying to figure out how to redirect call audio from both endpoints to the free ALSA FE's (frontends) using the SoC mixer. For example, if I have the two free endpoints Multimedia1 (hw:0,0) and Multimedia2 (hw:0,1) how I can re-route the speaker/mic audio to hw:0,0 and GSM/Radio audio to hw:0,1 ?
The same applies to the Bluetooth and 3.5mm headset audio. For now I've figured out how to re-route the Bluetooth audio to hw:0,0 using these mixer commands :
Though the Bluetooth audio is still mangled by some VAD algorithm - it is still unknown for me is this VAD algo coming from Bluetooth or from some DSP embedded inside the Qualcomm SoC ?
I've saw the single post at stackoverflow, please do not send me to it again - the post is close but still not helpful. It will be good if somebody can draw (or describe) the mix diagram inside this SoC or provide the exact tinymix/amix re-route commands at least ;)
Was wondering if any devs have looked into this and might want to try it to see if root can be obtained this way. That would open alot of phones up to the possibility of root. Of course it would open everyone going to the url up to potential fake roots but thats a risk im willing to take. Tired being locked down on my Droid Turbo 2.
DragonTC is a build system for compiling custom clang toolchains. These toolchains contain some AOSP patches(where applicable) and things not included in AOSP clang, such as LTO and Gold plugins, and OpenMP, Polly compiled and automatically linked into tools, improved krait optimizations (-mcpu=krait2), and annoying flags such as -Werror, -Wfatal-errors, and -Weverything internally disabled for non-default parameters. DragonTC compilers are also built with -O3, -pthread, and -fopenmp in order to reduce compile time when used for ROMs. DragonTC has been around for a few months now, but now that some testers have helped me work out the bugs and make it close to stable, I've decided to make an XDA thread.
Why use custom Clang?
Google has been slowly moving away from GCC for a while now, so we believe that we should get ahead of the toolchain game and start now! Furthermore, AOSP modules that are compiled with clang can easily be optimized with the new LTO and Polly options.
How do I build DragonTC?
It's simple! Run the following commands in bash to get set up:
well ... first of all: I'm completely new to programming related to Android. I do have basic knowledge in programming with Basic and C. But im all new to Java and programming with the Android ecosystem (I am familiar with the Android ecosystem, though ... I've just never written code for Android).
Now I wanted a simple app to read out and display some sensor data, such as acceleration along y-axis and rotation angle around y-axis.
But I found the whole way you get stuff out of the sensors very confusing ans somehow unnecessarily complicated. However....
I've successfully managed to code an app, that checks whether certain sensors are available or not - and show an according text in a TextView for the user to read.
The next step was, I wanted to code an app that reads the rotation angle and shows the current angle in a TextView for the user. But I haven't managed that.
I found the whole System of reading the rotation data very complex..... why isn't there just a simple function like "get the y-axis rotation angle" and thats it .... I've searched a lot in the Interwebz, tried to understand how that stuff works, and used some code of some examples i thought i understood ... well, I obviously didn't ....
FloatingActionButton fab = (FloatingActionButton) findViewById(R.id.fab);
fab.setOnClickListener(new View.OnClickListener() {
@Override
public void onClick(View view) {
Snackbar.make(view, "Replace with your own action", Snackbar.LENGTH_LONG)
.setAction("Action", null).show();
}
});
@Override
public boolean onCreateOptionsMenu(Menu menu) {
// Inflate the menu; this adds items to the action bar if it is present.
getMenuInflater().inflate(R.menu.menu_main, menu);
return true;
}
@Override
public boolean onOptionsItemSelected(MenuItem item) {
// Handle action bar item clicks here. The action bar will
// automatically handle clicks on the Home/Up button, so long
// as you specify a parent activity in AndroidManifest.xml.
int id = item.getItemId();
//noinspection SimplifiableIfStatement
if (id == R.id.action_settings) {
return true;
}
return super.onOptionsItemSelected(item);
}
public void onSensorChanged(SensorEvent event) {
if (event.sensor.getType() == Sensor.TYPE_ACCELEROMETER)
mGravity = event.values;
if (event.sensor.getType() == Sensor.TYPE_MAGNETIC_FIELD)
mGeomagnetic = event.values;
if (mGravity != null && mGeomagnetic != null) {
float A[] = new float[9];
float I[] = new float[9];
boolean success = SensorManager.getRotationMatrix(A, I, mGravity, mGeomagnetic);
if (success) {
float orientation[] = new float[3];
SensorManager.getOrientation(A, orientation);
azimut = orientation[0]; // orientation contains: azimut, pitch and roll
pitch = orientation[1];
roll = orientation[2];
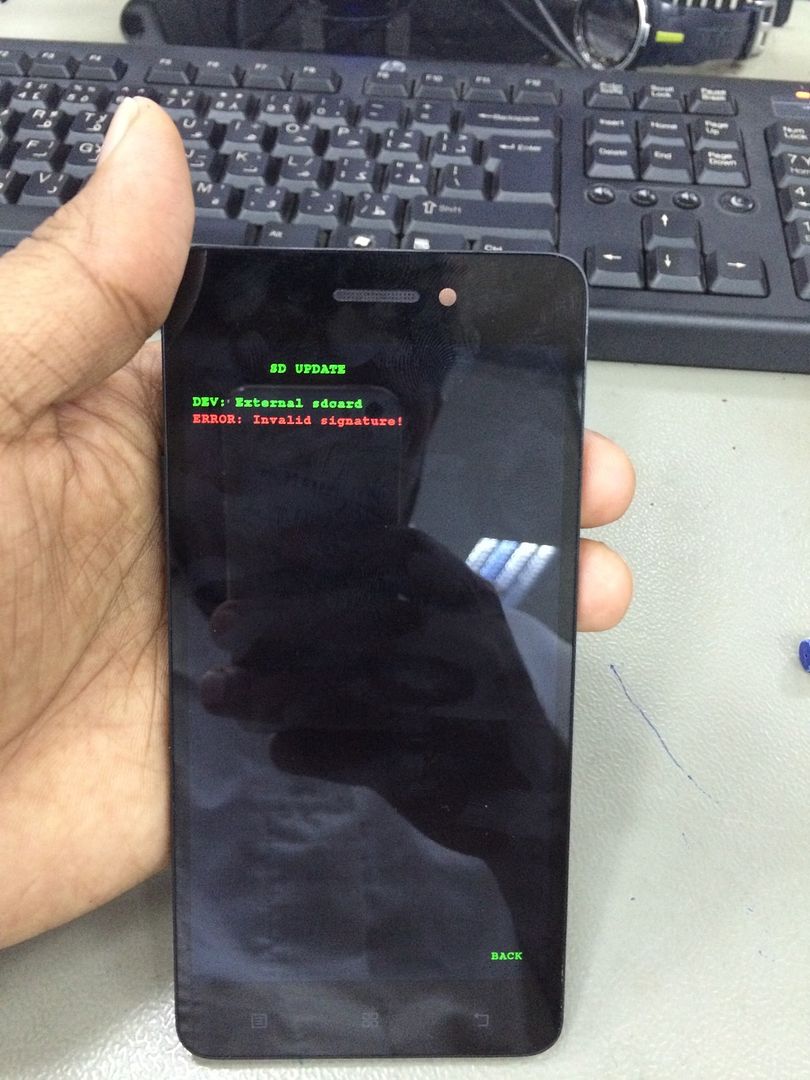
This is a step by step guide to flash(install) Karbonn Titanium S200 HD Official ROM.
Have a look at these screen-shots :good:
Prerequisite:
>Windows 7 PC.
>Spreadtrum USB Drivers
>SPD Upgrade Download Tool R2.9.9015
>Stock ROM (Karbonn_Titanium_S200_HD_V09_20151215.pac).
>USB cable & phone battery should be at-least 40%.
>WinRAR to extract .rar files.
Flashing Procedure
Step 1: Download Spreadtrum USB Drivers.rar on your Windows & extract it using winRAR.
Step 2: Now, right click on Computer & then Properties & then select Device Manager.
Step 3: Right click on your computer name & select Add legacy hardware
Step 4: Now, Click on Action Menu and Select Add legacy hardware.
Step 5: In the Add Hardware Wizard > Click on Next to continue.
Step 6: Select Install the hardware that I manually select from a list (Advanced) and click on Next to continue.
Step 7: Now, under common hardware types select on Show All Devices and click Next to continue.
Step 8: Now, click on Have Disk and using the browse button locate the Spreadtrum Driver (SciU2S.INF).
Step 9: Once your driver is listed in the blank area, click on Next to continue.
Step 10: Now, again click on Next to continue.
Step 11: Now, Select Install this driver software anyway. Wait until Device manager installs the Spreadtrum driver on your computer.
Step 12: Click on Finish button.
Step 13: Extract SPD Upgrade Tool R2.9.9015.rar and open UpgradeDownload.exe.
Step 14: Click on Load Packed button & Select the ROM with extension .pac at end
Step 15: Switch off your Mobile & connect it to PC using USB cable & quickly press Volume down key for 15 seconds. Flashing will be started. Do not touch your phone or USB cable and wait until it shows Passed or Success. It may take 10-15 minutes.
Step 16: Press Stop downloading after successful flashing. Your phone gonna reboot automatically, do not panic wait few minutes until home screen opens up. ;)
This is a tested & safer rooting guide to root your Karbonn Titanium S200 HD :cyclops:
You can root your phone without any PC. If fails, Try rooting on Windows.
YOU ARE RESPONSIBLE FOR YOUR PHONE, ROOTING VOIDS WARRANTY! :good:
Rooting Procedure:
1. Download latest Kingroot apk from http://www.kingroot.net and install on your phone.
2. Do not run unnecessary apps on your phone, connect your phone to internet and open Kingroot app.
3. Kingroot will automatically check your device and gonna show you rooting strategy, try root strategy & wait until it reaches 100% ;) have patience. Do not minimize Kingroot or do not let your screen turned off.
4. Your phone may restart before reaching 100% rooting :cyclops: do not panic, try again! rooting will be resumed.
5. If rooting fails, then restart your phone and try again rooting with Kingroot. Sometimes first attempt fails.
6. I was able to root my S200 HD on second attempt. If you are facing problems while rooting with Kingroot app then download Kingroot for Windows & install on your PC.
7. Turn on USB debugging on your S200 HD. You can enable this option in "developer options". Your phone must be switched on. And then connect to your PC via USB cable.
8. Your PC should be connected to internet. Now, open Kingroot on your Windows on click on root.
It will take few minutes, your phone may restart many times while rooting, no need to worry about it. Wait until you see rooting successful!
WiFi direct has a shell tool for doing configuration changes called "p2p_cli". I can't find a newer version compiled to run on Android 5.0 with the new PIE security requirement.
I want to detect the case status (open/close).
In the case without window I could use detection screen status (on/off) like this:
Code:
adb shell dumpsys power | grep mScreenOn
In the case with the window (eg. LG Circle Case) after closing the case I can't use the detection screen status (case closed but the screen may be ON).
I want to detect only case status (using a magnet sensor in the corner of the case and screen)
This is a safer & tested guide to root any Lava Iris X1 Broadcom CPU phones :cyclops:
I have rooted at least 4 Lava Iris X1 Broadcom CPU phones.
These are one click root methods, of course! for the lazy people :p
Those who have updated their ROM, backup your contacts, pictures, videos and do a "factory data reset".
Battery should be at least 40%.
Factory data reset is recommended by Lava,
It resolves issues after update (such as call log history empty).
ROOTING VOIDS WARRANTY! I'M NOT RESPONSIBLE FOR YOUR DEVICE.
Tested firmware versions:
> S209
> S404
> S505
> S603
ROOT ACCESS BY KINGROOT ANDROID APP
1. Download latest KingRoot app from official website http://www.kingroot.net
install on your phone. Go to developer options and turn on USB Debugging
2. Connect your phone to internet. Close all unnecessary apps & open KingRoot app.
3. Now, try root strategy & tap on rooting. Remember! your phone must be connected to internet.
Do not minimize kingroot or turn off your screen.
4. Wait like good boy ;) do not panic if your phone restarts before 100%.
Try rooting once again if it fails on very first attempt.
5. If rooting fails then reboot your device and try rooting again.
Sometimes it takes few more attempts to root your device.
6. Wait until it reaches 100%. If rooting is unsuccessful then try rooting via KingRoot PC tool.
ROOT VIA KINGROOT WINDOWS TOOL
1. Windows 7 is recommended. download Kingroot setup for Windows and install it. http://www.kingroot.net
USB Debugging must be enabled on your phone & your PC must be connected to internet.
2. Turn your phone on & connect via USB cable & do nothing. Open Kingroot on PC & start rooting.
3. It will take 10 to 15 minutes to root your device. Do not touch or shake your USB cable or phone.
Phone may restart many times, no need to worry about it. Wait till it shows 100%.
4. If rooting is unsuccessful! reboot your phone & start from beginning.
No feat is achieved on very first attempt :silly:
5. After successful rooting see your phone, you will find a Kingroot app is installed on your phone,
open that app and see the result If not rooted! try rooting with that app.
If both the above method fails then try the following rooting method.
ROOT BY COMBINED ATTACK OF KINGROOT & IROOT WINDOWS TOOL
1. Some updated Iris X1 ROMs do not root easily, we gonna use Kingroot & iRoot Windows tools combinely
to root those ROMs. Recently I have discovered this root method while rooting S603 firmware.
Download & install iRoot for PC from official http://www.iroot.com/.
2. Both iRoot & Kingroot Windows tool must be installed on your PC. Internet should be connected to your PC.
Turn on your phone, enable USB debugging & connect to PC via USB cable.
3. Open iRoot on PC. Your phone will be shown on iRoot. Now, start rooting.
It may take few minutes, you have to wait. After successful rooting,
open Kingroot android app on your phone try to root.
4. If failed! then open Kingroot PC tool on Windows & try rooting.
It will be successful for sure :good: Now open Kingroot app on android & enjoy!
I am trying to build a custom ROM for Android that has a built in firewall. In doing this I want to allow my Settings app to block different apps from using mobile data and/or wifi.
My approach so far has been to add new selinux policy rules to allow system level apps to interact with iptables. I have tried multiple different policies, but here is what I currently have.
I didn't define a new "domain" for iptables and I wasn't sure if I needed to declare the system_app domain again, or if this would just be appended to that.
Thanks in advance for any help. If anyone has any pointers on where to look to get a better understanding of SELinux inside of android, please let me know.
The init.d simulator Simulates init.d compatibility, for ROMs / KERNELs without it!
INTRODUCTION
Init.d scripting and modding is an essential part of the android tweaking community, and devices without that feature build-in or any replacement ROMs / KERNELs build for them, are missing out.
Luckily there's many apps out there that allow files to be executed during boot-time, some even made for the soul purpose of simulating the init.d feature. But they all take space, maybe even a lot of it, and slow down the boot process. This script doesn't.
It installs a script into android that will be called during bootup.
If the init.d folder doesn't exist for some reason, it creates it, otherwise it executes all files inside /system/etc/init.d.
It also prints a log file into /system/etc/init.d/INTILOG.txt so the user can see what files were executed.
HOW TO USE & REQUIREMENTS
- You need busybox installed for the script to function properly
If you lack one, use mine from here
To use the script, you have to run it, either by terminal:
Code:
su

/the/directory/where/you/downloaded/th/script/Initd_Simulator

And let it do its magic.
Or, you can use Smanager, from PlayStore [Recommended]
Navigate to where you downloaded the script using Smanager and run it with root enabled. THAT'S IT!
DOWNLOAD & CHANGELOG Version 2.0Click me!
Changelog:
Code:
Version 2.0

- Rebuild the whole script

- Cleaned the code

- Made init.d status checking more accurate

- Made the user-interface better looking and more convenient

- Implemented error free init.d simulation

- Implemented non-destructive init.d simulation

- Improved logging

Version 1.2

- Fixed Logging

- Fixed file executing

- Fixed a bug that prevented the whole script from running

- Fixed installing and updating

Version 1.0

Initial release
Thanks to my tester
-
Ask before using my work in yours and add proper credits Donations aren't expected, but are appreciated
XDA:DevDB Information _Bon_Bon's Init.d Simulator, Tool/Utility for all devices (see above for details)